This 3D printed robot is made for sumo wrestling tournaments
This 3D printed robot is made for sumo wrestling tournaments
Arduino Team — February 13, 2023

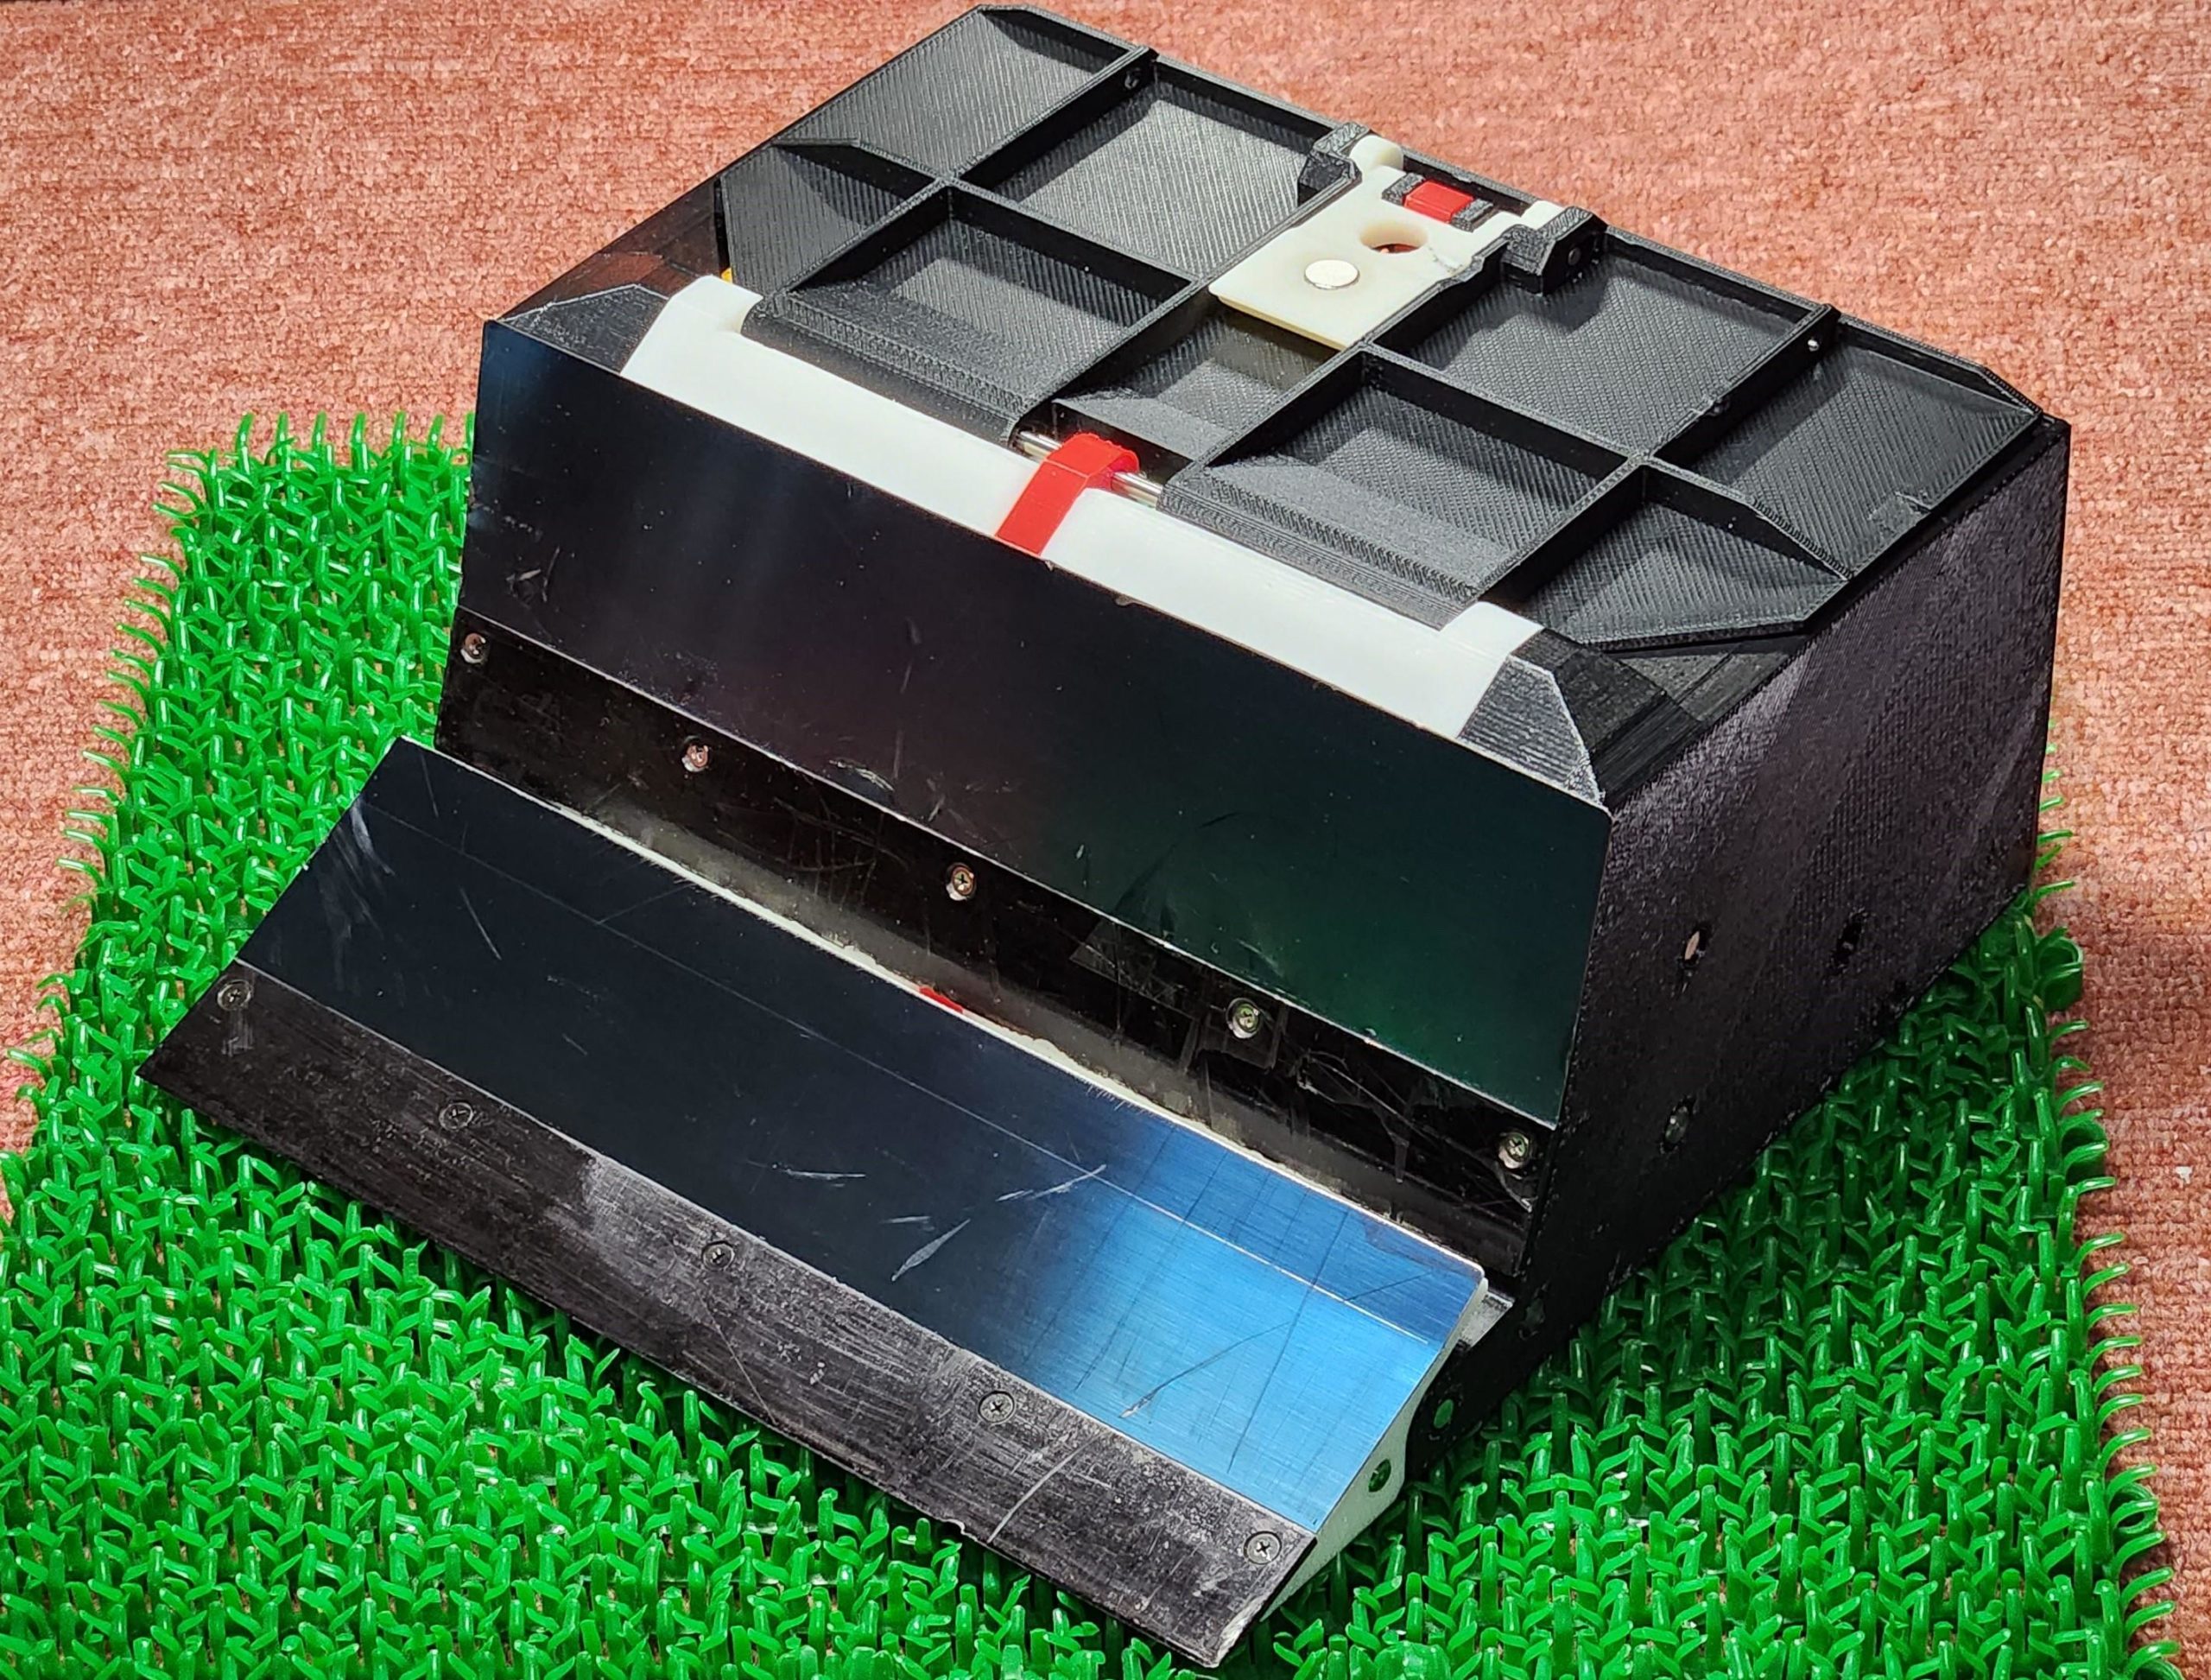
While the majority of manufacturers cannot afford the fancy equipment and components that go into modern, state-of-the-art combat robots, there are tournaments less known for more DIY designs, including robot sumo battles. Instructables user noclaf8810373's design incorporates all the high-powered components one would expect to find, along with an innovative defense mechanism.
Building the robot began with 3D printing almost everything from ABS filament due to its strength and resistance to high temperatures, while nylon was used in the equipment. Once cleaned, a series of strong magnets were placed in both the front blade and the undercarriage to help prevent the robot from flipping over due to an opposing robot. Internally, a pair of motors drive the wheels through multiple gears for increased torque, and they're both controlled by an Arduino Micro. In this case, the role of the microcontroller is to take incoming data from the radio transmitter, convert it into commands, and tune the motors accordingly.

After assembling the electronic components including the Arduino, motor drivers and large capacitors on a piece of perfboard, they were securely fastened inside the robot's interior compartment. For more on the building process, you can check out the project write-up here on Instructables.
Arduino Team — February 13, 2023
While the majority of manufacturers cannot afford the fancy equipment and components that go into modern, state-of-the-art combat robots, there are tournaments less known for more DIY designs, including robot sumo battles. Instructables user noclaf8810373's design incorporates all the high-powered components one would expect to find, along with an innovative defense mechanism.
Building the robot began with 3D printing almost everything from ABS filament due to its strength and resistance to high temperatures, while nylon was used in the equipment. Once cleaned, a series of strong magnets were placed in both the front blade and the undercarriage to help prevent the robot from flipping over due to an opposing robot. Internally, a pair of motors drive the wheels through multiple gears for increased torque, and they're both controlled by an Arduino Micro. In this case, the role of the microcontroller is to take incoming data from the radio transmitter, convert it into commands, and tune the motors accordingly.
After assembling the electronic components including the Arduino, motor drivers and large capacitors on a piece of perfboard, they were securely fastened inside the robot's interior compartment. For more on the building process, you can check out the project write-up here on Instructables.
What's Your Reaction?