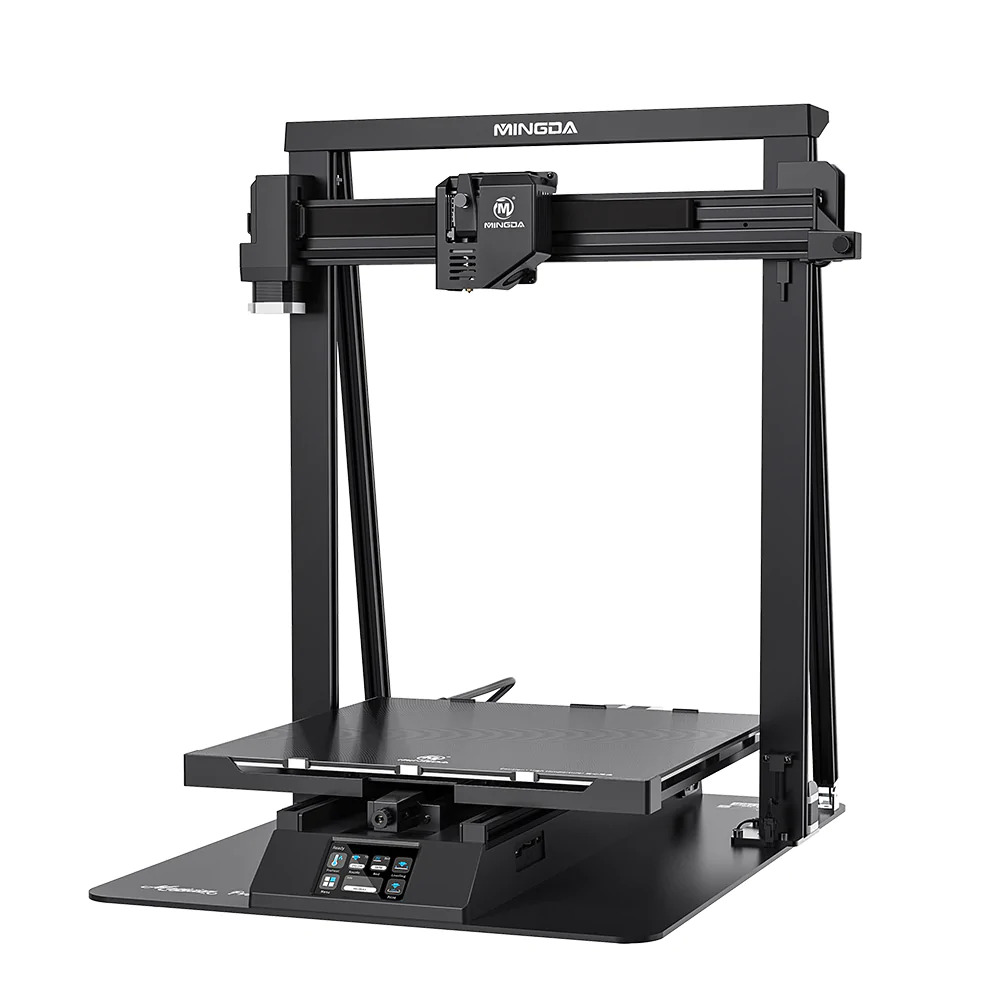
3D Printer Review: Mingda Magician Pro
Manufacturer: Mingda
URL: http://www.3dmingdaofficial.com
Price: $599
FeaturesThe Mingda Magician Pro is for people who want to print great things with decent features, without spending money on a massive 3D printer. At around $600, this printer won't compete head-to-head with the more budget-conscious (as its little sibling, the Mingda Wizard X does), but will instead appeal to those who want to make things like helmets with space to spare.< /p>
The standout feature, of course, is the 400 x 400 x 400mm build volume. That's a lot of space to play with. Automatic bed leveling is also a nice feature.
Here are the technical specifications from their website:
● Print Size: 40×40×40cm (15.7″×15.7″×15.7″) ● Calibration: Self-developed Auto-Leveling, 36 Dots ● Filament Diameter: 1.75 mm ● Printing material: PLA / ABS / PETG and TPU ● Nozzle size: 0.4mm default, wide range of other nozzles supported ● Extruder: direct drive, dual gears ● Filament run out detection: Supported ● Resume Printing: Supported ● Toolbox: Yes ● Max Nozzle Temperature: 260°C/500°F ● Max Heated Bed Temperature: 110°C/230°F ● Average Speed speed: 8-10 cm/s, 3.1-3.9 in/s ● Control panel: 3.5 inch colorful LCD touch screen ● Printing interface: SD card, U Disk, USB-C ● Z axis : double threaded rod with synchronous belt ● Machine weight: 14.5 kg ● Machine dimensions: 65 × 58.6 × 67.5 cm / 25.5*23.0*26.5 inch (X×Y ×Z)
ImplementOut of the box, the setup was very simple. Basically, you just need to line up the vertical parts (the main frame and 2 spacers) and drop in a few screws. After that, all that's involved is plugging in the loose wires.
The whole process took me about 10 minutes.

When the time comes to print, you can slice using just about any popular slicer. Cura offers this machine as a preset option. Then load to the machine via USB, SD card or USB-C.

The LCD touchscreen does a good job of controlling it, although it looks a little plain and perhaps a bit dated. You don't get a visual preview of your file.
Manufacturer: Mingda
URL: http://www.3dmingdaofficial.com
Price: $599
FeaturesThe Mingda Magician Pro is for people who want to print great things with decent features, without spending money on a massive 3D printer. At around $600, this printer won't compete head-to-head with the more budget-conscious (as its little sibling, the Mingda Wizard X does), but will instead appeal to those who want to make things like helmets with space to spare.< /p>
The standout feature, of course, is the 400 x 400 x 400mm build volume. That's a lot of space to play with. Automatic bed leveling is also a nice feature.
Here are the technical specifications from their website:
● Print Size: 40×40×40cm (15.7″×15.7″×15.7″) ● Calibration: Self-developed Auto-Leveling, 36 Dots ● Filament Diameter: 1.75 mm ● Printing material: PLA / ABS / PETG and TPU ● Nozzle size: 0.4mm default, wide range of other nozzles supported ● Extruder: direct drive, dual gears ● Filament run out detection: Supported ● Resume Printing: Supported ● Toolbox: Yes ● Max Nozzle Temperature: 260°C/500°F ● Max Heated Bed Temperature: 110°C/230°F ● Average Speed speed: 8-10 cm/s, 3.1-3.9 in/s ● Control panel: 3.5 inch colorful LCD touch screen ● Printing interface: SD card, U Disk, USB-C ● Z axis : double threaded rod with synchronous belt ● Machine weight: 14.5 kg ● Machine dimensions: 65 × 58.6 × 67.5 cm / 25.5*23.0*26.5 inch (X×Y ×Z)
ImplementOut of the box, the setup was very simple. Basically, you just need to line up the vertical parts (the main frame and 2 spacers) and drop in a few screws. After that, all that's involved is plugging in the loose wires.
The whole process took me about 10 minutes.
When the time comes to print, you can slice using just about any popular slicer. Cura offers this machine as a preset option. Then load to the machine via USB, SD card or USB-C.
The LCD touchscreen does a good job of controlling it, although it looks a little plain and perhaps a bit dated. You don't get a visual preview of your file.
What's Your Reaction?