Debugging the laser-cut oscillation, scientifically
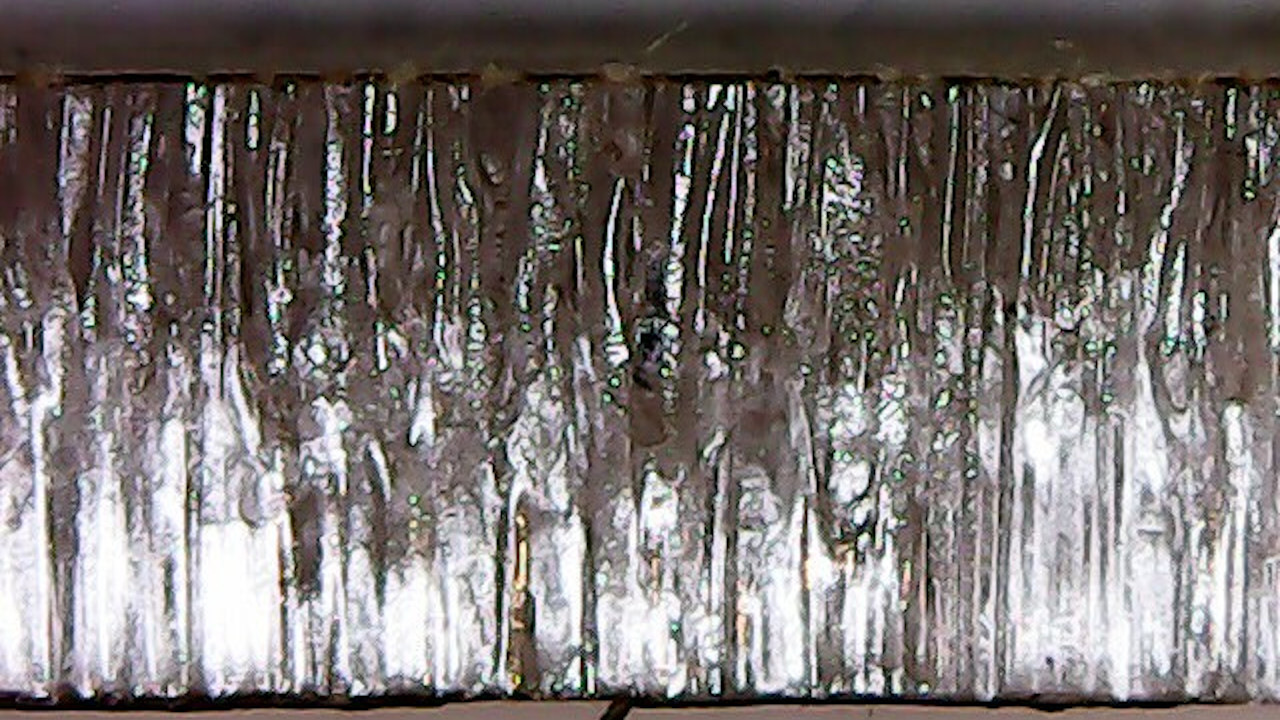
[PWalsh] was using his laser cutter to cut the acrylic, expecting the cutouts to have a pleasantly smooth edge. Alas, the edges turned out to be wobbly and sandpaper-like, not smooth at all. Shame! The internet suggested a stepper motor swap, but not much in the way of ideas - and it sure would have been a royal pain. How would you approach debugging such an issue? Well, [PWalsh] didn't want to swap crucial components willy-nilly, instead going the scientific route, and breaking it down for us.
After compiling a long list of possible places to look for a defect, he began to make some fundamental assumptions. Do other laser cutters have this problem? No, even the cheapest ones can cut things right. Is the water level causing intermittent cooling? No, not that. Is it the pitch settings? Modified, not that. Laser pulse frequency? No dice.
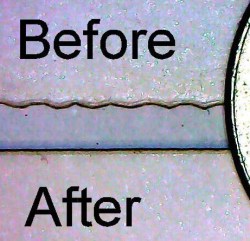 Air Support? Yes! Somehow the air assist was causing the jagged edges, and just unplugging it turned the cut edge into a smooth surface. Running unattended is not the solution, and additional debugging has been done. Is it the power supply or is it the uneven airflow, causing "puffing"? An air tank was added inline with the assist tube, smoothing out the flow, and the problem was gone for good. Bonus points - by going through the debugging stages of the issue, the cutter also got some much needed maintenance checks.
Anyone who has even debugged a weird problem with a 3D printer can relate to such an experience and might appreciate a scientific approach to the problem. After all, 3D printing itself can be a bit of a science you get into with your printer purchase, and problems can arise where you don't expect them. It's always fun to learn debugging stories, and having the right mindset from the start will help you save a lot of time you could be spending printing or cutting.
[PWalsh] was using his laser cutter to cut the acrylic, expecting the cutouts to have a pleasantly smooth edge. Alas, the edges turned out to be wobbly and sandpaper-like, not smooth at all. Shame! The internet suggested a stepper motor swap, but not much in the way of ideas - and it sure would have been a royal pain. How would you approach debugging such an issue? Well, [PWalsh] didn't want to swap crucial components willy-nilly, instead going the scientific route, and breaking it down for us.
After compiling a long list of possible places to look for a defect, he began to make some fundamental assumptions. Do other laser cutters have this problem? No, even the cheapest ones can cut things right. Is the water level causing intermittent cooling? No, not that. Is it the pitch settings? Modified, not that. Laser pulse frequency? No dice.
Air Support? Yes! Somehow the air assist was causing the jagged edges, and just unplugging it turned the cut edge into a smooth surface. Running unattended is not the solution, and additional debugging has been done. Is it the power supply or is it the uneven airflow, causing "puffing"? An air tank was added inline with the assist tube, smoothing out the flow, and the problem was gone for good. Bonus points - by going through the debugging stages of the issue, the cutter also got some much needed maintenance checks.
Anyone who has even debugged a weird problem with a 3D printer can relate to such an experience and might appreciate a scientific approach to the problem. After all, 3D printing itself can be a bit of a science you get into with your printer purchase, and problems can arise where you don't expect them. It's always fun to learn debugging stories, and having the right mindset from the start will help you save a lot of time you could be spending printing or cutting.
What's Your Reaction?